Let's face it: building a kickass pad is no easy task. You can make your room really stylish but you'll find sooner or later that you have no more room to arrange all your fancy furniture. You attempt to squeeze things in and before you know it, it's a giant clusterfuck and everything has gone straight to hell. Sadface. What you need is multiple floors. Why, how would one perform such a task you ask? Stacking blocks is key. Allow me to demonstrate.
Before you begin, there are several things you probably should have in your possession:
- Garbage blocks. You know the types. That hideous bright orange block or that gross purple one you got from Gacha. It's not a bad idea to keep at least two on hand--they're great for stacking.
- Tile blocks/Blocks of your choice. Now you'll be needing a lot of these. Not only do these actually make up your next floor, they'll also be used for the staircase (how else are you going to get up to your next floor?). Save your gummies kids 'cuz this ain't a cheap process. I personally prefer the tile blocks at 200 gummies a pop. They're thinner and makes your place look less cluttered when using them for another floor. But really, you could use giant blocks for all I care (keep in mind those are 300 a piece).
 ll starts from here. Let's use my room as an example shall we? I'll start from my second floor, but it's essentially the same concept each time you want to build upwards. First, you lay one block down...
And then another one on top of the one you just set down.

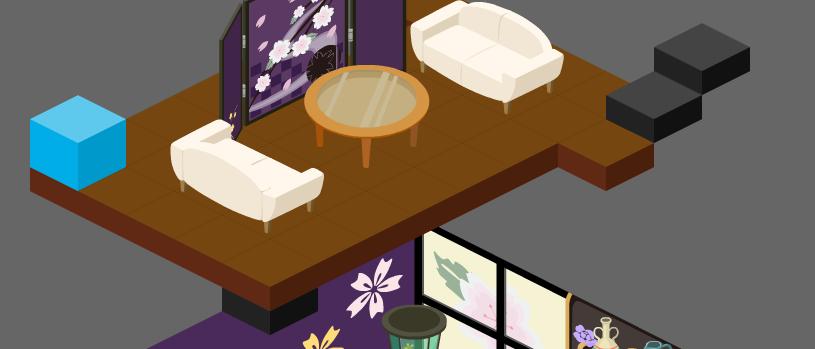
Then you put, in my case, the blue block on top of the brown. You'll notice that your blocks are now defying gravity. Good. We're getting somewhere.

Now you continue pulling the one out from under and placing it on top until you reach your desired height. We'll henceforth refer to this tactic as stacking. Once you get it to your desired height, laying down the foundation begins.
 In these next few images, I'll be using my already constructed third floor (a soon to be garden if you must know) with a few chunks taken out. What I'm using as my foundation is thin, bright green tile blocks. What you do is place one on the stacked block. Then click it so that the move/rotate/pickup bubbles appear.
 Not many people know this, but in this mode you are allowed to move the selected item with your arrow keys.
 Why is this important? It allows you to move blocks in air, essentially as you are starting on a stacked platform. Meaning once you place a tile on your stacked blocks, you can move them anywhere on that level. This makes building your next floor a cinch.
Hope this helps, fellow Pico enthusiasts.
-B
how can you get pets?
ReplyDeletehi im a abog fan of pico i wanted as well to make a blog!. i see you made one you got some cool images i love pico i just got a pet now for my birthday i know right is rediculous to buy a pet for that much but for 4 dollars you can buy 500 gold wich you can buy a pet and a extra thing for urself im intresed it the free ameba gold thing. so i just wanted to say i was in your event the event and i would really liketo add you as a friend my name is lalus i would like to learn more about blogging with your tecnicks im a big fan of your work when i make my pico blog hope you can check it out thanks !!!!
ReplyDeletelaylalu, thanks for giving me some feedback! Surveys are always a good way to get some extra gold; I've personally gone through a lot myself...hahaha. Also, thanks for attending my event. I look forward to your Pico blog.
ReplyDelete-B
awesome!
ReplyDeletehello does it only work in right side corner? i try doing it right side but the blocks didnt move =[
ReplyDeletetell me how to build the second floor first and i'll be thankful.
ReplyDelete